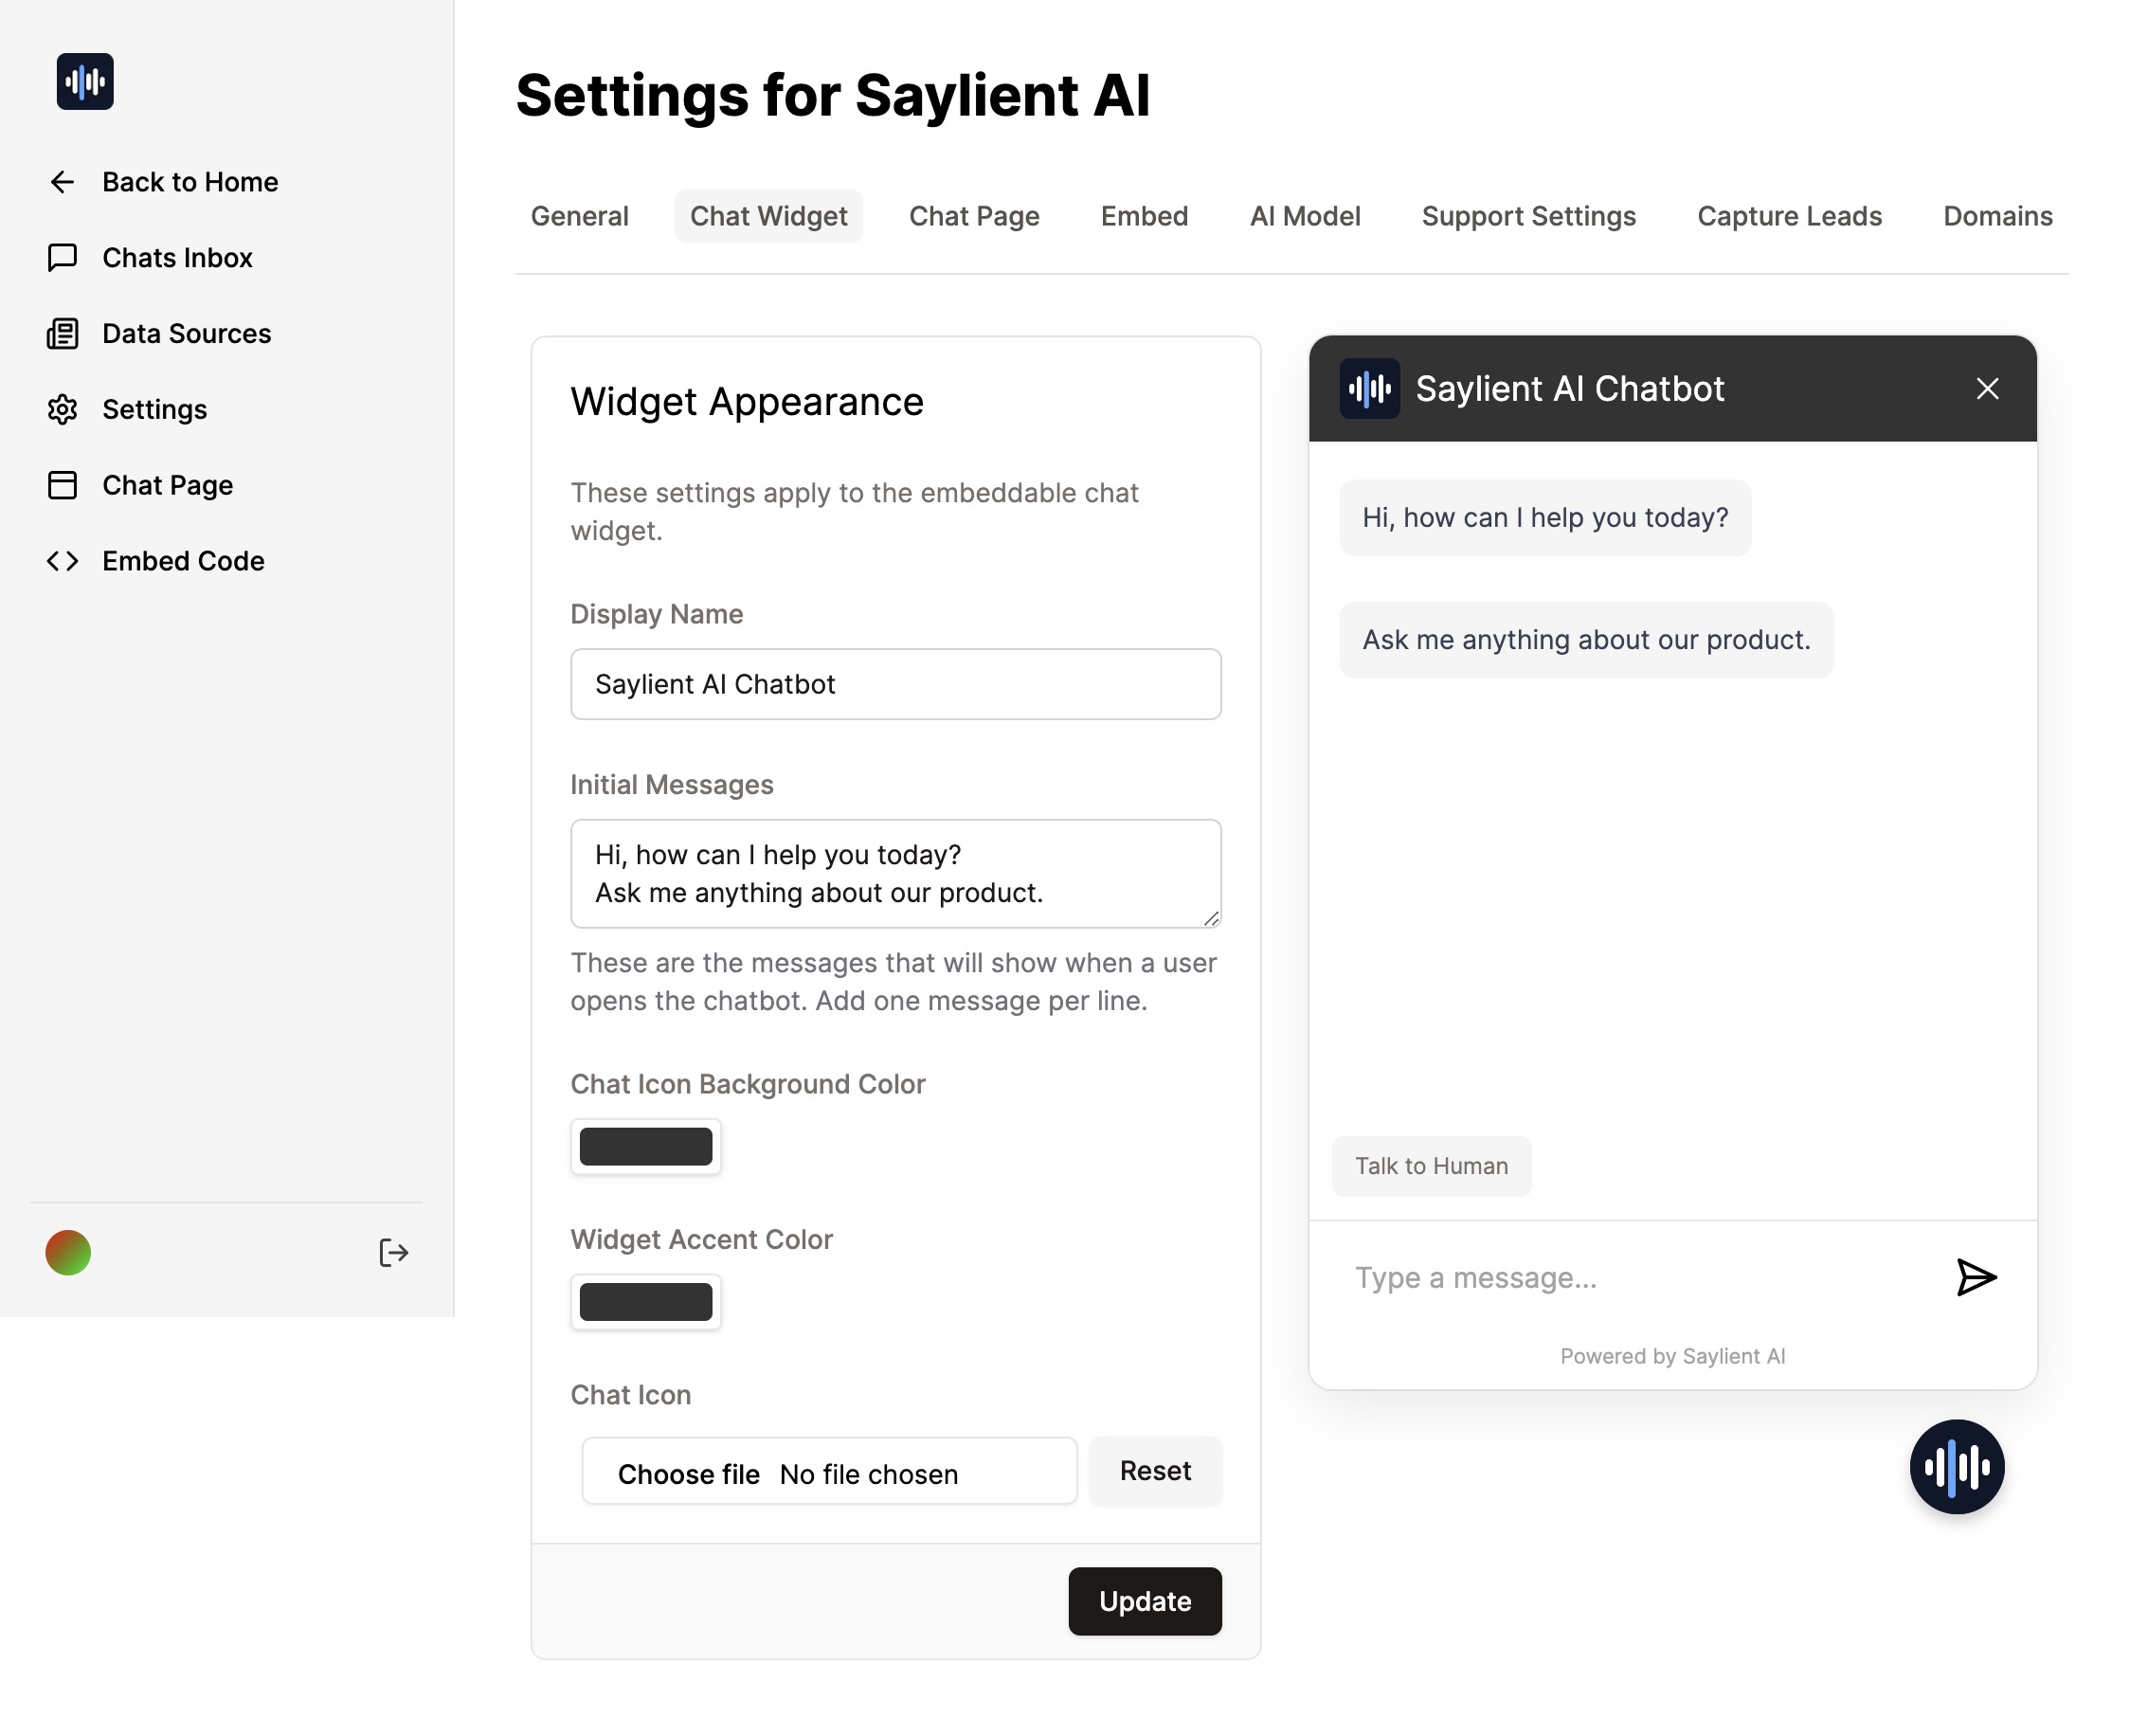
Chatbot Widget Settings
After creating your hub, you can customize the appearance and behavior of your chatbot widget. These settings determine how the chatbot will look and interact when embedded on your website. To access these settings:
- Navigate to the "Settings" section in the left sidebar menu.
- Click on the "Chat Widget" tab in the settings area.
Widget Appearance
The Widget Appearance section allows you to customize the visual aspects of your chatbot:
Display Name: Set the name that appears at the top of the chat widget. In the example, it's set to "Saylient AI Chatbot".
Initial Messages: Configure the greeting messages that users see when they first open the chat. These messages set the tone and guide users on how to interact with the bot. Add one message per line.
Chat Icon Background Color: Choose the background color for the chat icon that appears on your website.
Widget Accent Color: Select an accent color that will be used throughout the widget to maintain consistent branding.
Chat Icon: Upload a custom icon for your chat widget. This icon will appear in the corner of your website to open the chat.

Preview
As you adjust these settings, a live preview of the chat widget appears on the right side of the screen. This allows you to see how your changes will look in real-time.
Saving Changes
After customizing your widget, don't forget to click the "Update" button at the bottom of the settings panel to save your changes.
By carefully configuring these settings, you can create a chat widget that seamlessly integrates with your website's design and effectively engages your visitors.
